Spring Boot에서 Selenium 시도해보기
웹페이지를 동적으로 로딩하여 데이터를 가져오는 웹 스크래핑이 필요한 상황이다. 이에 Selenium을 통해 스크래핑을 구현하려고 한다.
웹페이지를 동적으로 로딩하여 데이터를 가져오는 웹 스크래핑이 필요한 상황이다. 이에 Selenium을 통해 스크래핑을 구현하려고 한다.
Selenium
- Selenium은 웹 브라우저를 자동화하여 다양한 상호작용을 할 수 있도록 하는 오픈소스이다.
- Python, Java, Ruby 등 다양한 언어를 지원한다.
- 해당 자동화 기능을 통해 코드 레벨에서 웹브라우저의 원하는 데이터를 가져오는 스크랩핑을 할 수 있다.
- Selenium은 브라우저의 자동화를 위해 브라우저의 WebDriver위에서 동작한다. 즉, WebDriver의 설치가 필수이다.
Selenium in Spring Boot
의존성 추가
1
2
3
4
dependencies {
	...
	implementation 'org.seleniumhq.selenium:selenium-java:4.31.0'
}
WebDriver 설치
크롬 설정에서 본인의 크롬 버전을 확인한 뒤,
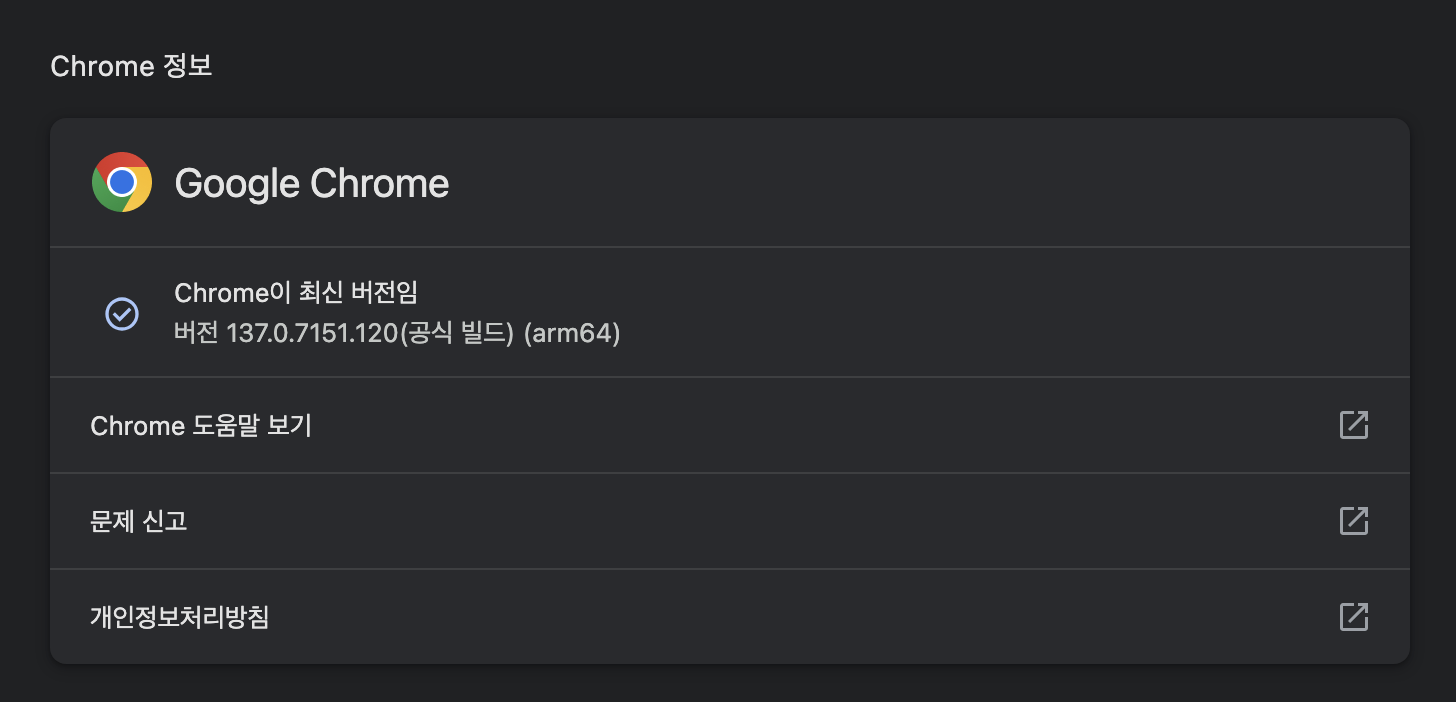
아래 링크에서 맞는 버전과 OS를 찾아 다운로드한다. https://github.com/GoogleChromeLabs/chrome-for-testing/blob/main/data/latest-versions-per-milestone-with-downloads.json
- 다운로드 후, 압축을 풀어 chromewebdriver파일의 경로를 복사한다.
- Spring에서 해당 경로를 환경변수로 넣어 webdriver를 사용할 수 있도록 해야한다.
ScraperUtil
1
2
3
4
5
6
7
8
9
10
11
12
13
14
15
16
17
18
19
20
21
22
@Component
@RequiredArgsConstructor
public class ScarperUtil {

    @Value("${scraper.web-driver-path}")
    private String WEB_DRIVER_PATH;

    private final Environment environment;

    public WebDriver getWebDriver() {
		System.setProperty("webdriver.chrome.driver", WEB_DRIVER_PATH);

        ChromeOptions options = new ChromeOptions();
        options.addArguments("--headless");
        options.addArguments("--no-sandbox");
        options.addArguments("--disable-gpu");
        options.addArguments("--disable-extensions");
        options.addArguments("--disable-dev-shm-usage");
        options.addArguments("--disable-extensions");
        return new ChromeDriver(options);
    }
}
- 위 클래스는 Selenium을 통해 Scraper를 진행하기 위한 WebDriver를 설정하는 클래스이다.
- 위에서 설치한 webdriver파일을
application.yaml파일에서 scraper.web-driver-path로 설정한 뒤, 이를System.setProperty()를 사용해 환경변수로 등록한다. - 이후 Scraper시 사용할 옵션값들을 정의할
ChromeOptions에서 파라미터를 추가한 뒤, ChromeWebdriver를 리턴하여 Scraper를 진행할 Webdriver를 초기화할 수 있다.
Scraper
1
2
3
4
5
6
7
8
9
10
11
12
13
14
15
16
17
18
19
20
21
22
23
24
25
26
27
28
29
30
31
@Component
@RequiredArgsConstructor
public class Scraper {

    private final ScraperUtil scraperUtil;
    private final ObjectMapper objectMapper;
    private static final String URL = "https://www.jobkorea.co.kr/recruit/joblist?menucode=duty";

    private WebDriver initWebDriver() {
        WebDriver driver = crawlerUtil.getWebDriver();
        driver.get(URL);
        return driver;
    }

    public List<RecruitResponseDto> scrapRecruits() {
        WebDriver driver = initWebDriver();
        List<WebElement> recruits = driver.findElements(By.cssSelector(".job.circleType.dev-tab.dev-duty .nano-content.dev-main .item"));

        return recruits.stream()
                .map(recruit -> recruit.getAttribute("data-value-json"))
                .filter(Objects::nonNull)
                .map(jsonString -> {
                    try {
                        return objectMapper.readValue(jsonString, RecruitResponseDto.class);
                    } catch (JsonProcessingException e) {
                        throw new RuntimeException(e);
                    }
                })
                .toList();
    }
}
- 해당 클래스는 실제 스크래핑을 진행하는 자바 코드이다.
initWebDriver()를 통해 스크래핑을 진행할 url을 설정하였다.scrapRecruit()메서드에서 필요로 하는 요소들을 찾아objectMapper를 통해 자바 Object로 파싱하여 리턴하였다.- 해당 코드에서는 findElements(), getAttribute()와 같은 메서드를 사용하였지만 클릭, 대기 등과 같은 다양한 브라우저 상호작용을 수행할 수 있다.
- https://www.selenium.dev/documentation/webdriver/actions_api/
- 해당 Selenium 공식 문서에서 키보드, 마우스, 펜, 휠 같은 동작 API를 확인할 수 있다.
Selenium in Ubuntu
- 완성된 스크래퍼 코드를 배포하여 서버단에서 동작하도록 하기 위해, 우분투에서 webdriver 설치를 해야한다. 추가로, 우분투 서버상에는 브라우저가 없으므로 chrome도 동시에 설치해주어야 한다. ```bash apt-get update && apt-get install -y unzip curl -Lo “/tmp/chromedriver-linux64.zip” “https://storage.googleapis.com/chrome-for-testing-public/136.0.7103.92/linux64/chromedriver-linux64.zip” curl -Lo “/tmp/chrome-linux64.zip” “https://storage.googleapis.com/chrome-for-testing-public/136.0.7103.92/linux64/chrome-linux64.zip”
unzip /tmp/chromedriver-linux64.zip -d /opt/ unzip /tmp/chrome-linux64.zip -d /opt/
1
2
3
4
5
6
7
- 다음 명령어와 같이 chrome과 chrome-webdriver를 설치해 주었다.
- 이때 크롬과 드라이버를 동시에 설치하므로 두 프로그램의 버전이 같기만 하면 된다.
- 이후 webdriver의 경로를 Spring Boot의 dev환경에서 실행할 수 있도록 수정한 뒤, 배포를 진행했다.


### 문제 발생
Error starting ApplicationContext. To display the condition evaluation report re-run your application with ‘debug’ enabled. 2025-05-07T18:36:46.285+09:00 ERROR 1 — [xpact] [ main] o.s.boot.SpringApplication : Application run failed
org.openqa.selenium.remote.NoSuchDriverException: Unable to obtain: chromedriver, error chromedriver must exist: /home/ubuntu/chromedriver-linux64/chromedriver For documentation on this error, please visit: https://www.selenium.dev/documentation/webdriver/troubleshooting/errors/driver_location/ Build info: version: ‘4.25.0’, revision: ‘8a8aea2337’
1
2
3
4
5
6
7
8
9
10
11
12
13
14
- Spring 로그를 확인했더니, 다음과 같은 에러가 발생하였다. 웹드라이버가 존재해야하는데 없다는 것이었다. 주어진 경로에 chromedriver가 알맞게 위치해 있었고 설치도 정상적으로 되었기에 문제가 없었다고 생각했다.
- 한 시간정도의 삽질 후, Spring을 도커로 배포하여 컨테이너 내부에서 실행중이었기에 호스트의 웹드라이버에 접근하지 못했다는 어이없는 실수라는걸 알게 되엇다..
- 도커로 패키징하여 배포하는게 편하기는 하지만 이렇게 다양한 미들웨어가 붙게 되면 오히려 불편해질 수 있다는 사실을 알게 되었다.


### 해결방안
- Spring 애플리케이션이 호스트의 webdriver에 접근하기 위한 다음과 같은 방법을 생각해보았다.
### 1.  호스트의 webdriver경로를 Spring으로 볼륨처리
- 제일 호스트와 도커 컨테이너를 연결하는 제일 먼저 생각난 방식이지만 볼륨은 파일만 공유하는 것이기 때문에 프로세서 간의 연결에는 적절하지 않다고 판단했다.

### 2. webdriver를 서버모드로 실행
- webdriver를 서버모드로 실행하여 포트를 바인딩하는 방법이 있다.
```bash
chromedriver --port=9000
- 다음과 같이 포트를 열어 서버로 webdriver를 실행한 뒤,
1
2
3
4
5
6
7
8
9
ChromeOptions options = new ChromeOptions();
options.addArguments("--headless")
options.addArguments("--no-sandbox")
options.addArguments("--disable-gpu");

WebDriver driver = new RemoteWebDriver(
    new URL("http://127.0.0.1:9000"),
    options
);
- 다음과 같이 Spring에서
WebDriver를RemoteWebDriver로 사용하는 방법을 생각했다. - 하지만 프로젝트 실행 시 딱 한 번 실행되는 스크래퍼를 수행하기 위해 리소스를 잡아먹는 webdriver를 계속 켜두기에는 무겁다고 생각했다.
3. webdriver 이미지화
- 서버에서 추가로 사용하는 모든 애플리케이션을 도커 컨테이너화하여 관리하였기 때문에 webdriver또한 이미지로 패키징하여 Spring컨테이너와 같은 네트워크를 공유하도록 만들고자 했다.
selenium/standalone-chrome이라는 chrome과 webdriver를 하나의 패키지로 묶은 이미지가 존재하여 이를 사용해보았다.1 2 3 4 5 6 7 8 9
selenium: image: selenium/standalone-chrome:latest container_name: selenium ports: - "4444:4444" shm_size: 512mb networks: - mynetwork restart: no- 실행결과는 아래와 같다. ``` Caused by: org.openqa.selenium.TimeoutException: java.util.concurrent.TimeoutException Build info: version: ‘4.25.0’, revision: ‘8a8aea2337’ System info: os.name: ‘Linux’, os.arch: ‘amd64’, os.version: ‘6.8.0-1024-aws’, java.version: ‘17.0.2’ Driver info: driver.version: RemoteWebDriver at org.openqa.selenium.remote.http.jdk.JdkHttpClient.execute0(JdkHttpClient.java:418) ~[selenium-http-4.25.0.jar!/:na] at org.openqa.selenium.remote.http.AddSeleniumUserAgent.lambda$apply$0(AddSeleniumUserAgent.java:42) ~[selenium-http-4.25.0.jar!/:na] at org.openqa.selenium.remote.http.Filter.lambda$andFinally$1(Filter.java:55) ~[selenium-http-4.25.0.jar!/:na] at org.openqa.selenium.remote.http.jdk.JdkHttpClient.execute(JdkHttpClient.java:374) ~[selenium-http-4.25.0.jar!/:na] at org.openqa.selenium.remote.tracing.TracedHttpClient.execute(TracedHttpClient.java:54) ~[selenium-remote-driver-4.25.0.jar!/:na] at org.openqa.selenium.remote.ProtocolHandshake.createSession(ProtocolHandshake.java:89) ~[selenium-remote-driver-4.25.0.jar!/:na] at org.openqa.selenium.remote.ProtocolHandshake.createSession(ProtocolHandshake.java:75) ~[selenium-remote-driver-4.25.0.jar!/:na] at org.openqa.selenium.remote.ProtocolHandshake.createSession(ProtocolHandshake.java:61) ~[selenium-remote-driver-4.25.0.jar!/:na] at org.openqa.selenium.remote.HttpCommandExecutor.execute(HttpCommandExecutor.java:162) ~[selenium-remote-driver-4.25.0.jar!/:na] at org.openqa.selenium.remote.TracedCommandExecutor.execute(TracedCommandExecutor.java:53) ~[selenium-remote-driver-4.25.0.jar!/:na] at org.openqa.selenium.remote.RemoteWebDriver.execute(RemoteWebDriver.java:545) ~[selenium-remote-driver-4.25.0.jar!/:na] … 36 common frames omitted Caused by: java.util.concurrent.TimeoutException: null at java.base/java.util.concurrent.CompletableFuture.timedGet(CompletableFuture.java:1960) ~[na:na] at java.base/java.util.concurrent.CompletableFuture.get(CompletableFuture.java:2095) ~[na:na] at org.openqa.selenium.remote.http.jdk.JdkHttpClient.execute0(JdkHttpClient.java:401) ~[selenium-http-4.25.0.jar!/:na] … 46 common frames omitted
Caused by: org.openqa.selenium.SessionNotCreatedException: Could not start a new session. Response code 500. Message: Could not start a new session. Error while creating session with the driver service. Stopping driver service: Could not start a new session. Response code 500. Message: session not created: DevToolsActivePort file doesn’t exist Host info: host: ‘867a2996bab5’, ip: ‘172.20.0.4’ Build info: version: ‘4.32.0’, revision: ‘d17c8aa950’ System info: os.name: ‘Linux’, os.arch: ‘amd64’, os.version: ‘6.8.0-1028-aws’, java.version: ‘21.0.6’ Driver info: driver.version: unknown Build info: version: ‘4.32.0’, revision: ‘d17c8aa950’ System info: os.name: ‘Linux’, os.arch: ‘amd64’, os.version: ‘6.8.0-1028-aws’, java.version: ‘21.0.6’ Driver info: driver.version: unknown Build info: version: ‘4.25.0’, revision: ‘8a8aea2337’ System info: os.name: ‘Linux’, os.arch: ‘amd64’, os.version: ‘6.8.0-1028-aws’, java.version: ‘17.0.2’ Driver info: org.openqa.selenium.remote.RemoteWebDriver Command: [null, newSession {capabilities=[Capabilities {browserName: chrome, goog:chromeOptions: {args: [–headless=new, –no-sandbox, –disable-gpu, –disable-extensions, –disable-dev-shm-usage, –disable-extensions, –remote-allow-origins=], extensions: []}}]}] Capabilities {browserName: chrome, goog:chromeOptions: {args: [–headless=new, –no-sandbox, –disable-gpu, –disable-extensions, –disable-dev-shm-usage, –disable-extensions, –remote-allow-origins=], extensions: []}} at org.openqa.selenium.remote.ProtocolHandshake.createSession(ProtocolHandshake.java:114) ~[selenium-remote-driver-4.25.0.jar!/:na] at org.openqa.selenium.remote.ProtocolHandshake.createSession(ProtocolHandshake.java:75) ~[selenium-remote-driver-4.25.0.jar!/:na] at org.openqa.selenium.remote.ProtocolHandshake.createSession(ProtocolHandshake.java:61) ~[selenium-remote-driver-4.25.0.jar!/:na] at org.openqa.selenium.remote.HttpCommandExecutor.execute(HttpCommandExecutor.java:162) ~[selenium-remote-driver-4.25.0.jar!/:na] at org.openqa.selenium.remote.TracedCommandExecutor.execute(TracedCommandExecutor.java:53) ~[selenium-remote-driver-4.25.0.jar!/:na] at org.openqa.selenium.remote.RemoteWebDriver.execute(RemoteWebDriver.java:545) ~[selenium-remote-driver-4.25.0.jar!/:na] at org.openqa.selenium.remote.RemoteWebDriver.startSession(RemoteWebDriver.java:245) ~[selenium-remote-driver-4.25.0.jar!/:na] at org.openqa.selenium.remote.RemoteWebDriver.
1
2
3
4
5
6
7
8
9
10
11
12
13
14
15
16
17
18
19
20
21
22
23
24
25
26
27
28
29
30
31
32
33
34
35
36
37
38
39
40
41
42
43
44
45
46
47
48
49
50
51
52
53
54
55
56
57
58
59
60
61
62
63
- webdriver와 연결이 실패했다고 떴다..
- webdriver는 잘 실행되는데 spring과의 연결이 잘 안되는 듯 했다.
- 또한 webdriver를 이미지로 실행하니 안그래도 부족한 램을 잡아먹어 서버가 많이 느려지기까지 했다.
- Spring에서 스크래핑을 진행하려고 했던 것 자체가 문제였을까
- 필요한 데이터를 브라우저에서 가져오기 위해 딱 한 번 사용될 웹브라우저를 자원을 다 먹어가며 서버에 넣는게 맞나 싶었다.


## Selenium 사용 x -> AWS lambda 도입
- 숙고하며 고민한 결과, 스크래핑을 Spring에서 수행하지 않고, AWS의 람다를 통해 필요 시 호출하는 방법을 사용하기로 결정했다.
- 서버에서 webdriver를 사용하게 되면, 사용하지 않는데도 계속 실행 상태에 있어 서버의 리소스를 많이 잡아먹게 되었다. (t2.micro)
- 이에 필요 시마다 호출하여 값을 받아올 수 있는 람다가 현 상황에 맞는 해결방법이라고 생각했다. 리소스 또한 필요할 때마다 최대 10GB의 램까지 사용 가능하니 비용 측면으로도 저렴하고 성능 측면으로도 나쁘지 않은 선택이다.


### lambda함수 생성
- 크게 두 가지 방식이 있다.
1. 첫째는 직접 코드를 작성하여 올리는 방법
	- 이는 제일 쉬워보이는 방법이지만 스크래핑을 할 때는 chrome과 webdriver를 추가로 실행환경을 설정해주어야 하기 때문에 시간이 걸린다.
2. 둘째는 실행환경과 코드를 이미지화하여 올리는 방법이다.
	- `Dockerfile`을 통해 쉽게 실행환경을 설정할 수 있다는 장점이 있어 이를 통해 람다함수를 만들기로 하였다.

### main.py
```python
from selenium import webdriver
from selenium.webdriver.chrome.service import Service
from selenium.webdriver.chrome.options import Options
from selenium.webdriver.common.by import By
import json


def lambda_handler(event, context):
    chrome_options = Options()
    chrome_options.binary_location = "/opt/chrome/chrome"
    chrome_options.add_argument("--headless")
    chrome_options.add_argument("--no-sandbox")
    chrome_options.add_argument("--disable-dev-shm-usage")
    chrome_options.add_argument("--single-process")

    service = Service(executable_path="/opt/chromedriver")

    driver = webdriver.Chrome(
        service=service,
        options=chrome_options
    )

    driver.get("https://www.jobkorea.co.kr/recruit/joblist?menucode=duty")
    recruits = driver.find_elements(By.CSS_SELECTOR, ".job.circleType.dev-tab.dev-duty .nano-content.dev-main .item")

    results = []
    for recruit in recruits:
        json_str = recruit.get_attribute("data-value-json")
        if json_str:
            try:
                data = json.loads(json_str)
                results.append(data)
            except json.JSONDecodeError:
                pass

    driver.quit()

    return {
        'statusCode': 200,
        'body': results
    }
- 다음과 같이
lambda_handler함수를 생성하였다.
Dockerfile
1
2
3
4
5
6
7
8
9
10
11
12
13
14
15
16
17
18
19
20
21
FROM --platform=linux/amd64 public.ecr.aws/lambda/python:3.13 AS build

# install unzip, install chrome & webdriver -> /opt에 위치하도록 설정
RUN dnf install -y unzip && \
    curl -Lo "/tmp/chromedriver-linux64.zip" "https://storage.googleapis.com/chrome-for-testing-public/136.0.7103.92/linux64/chromedriver-linux64.zip" && \
    curl -Lo "/tmp/chrome-linux64.zip" "https://storage.googleapis.com/chrome-for-testing-public/136.0.7103.92/linux64/chrome-linux64.zip" && \
    unzip /tmp/chromedriver-linux64.zip -d /opt/ && \
    unzip /tmp/chrome-linux64.zip -d /opt/

# chrome 실행에 필요한 패키지 설치
RUN dnf install -y atk cups-libs gtk3 libXcomposite alsa-lib libXcursor libXdamage libXext libXi libXrandr libXScrnSaver libXtst pango at-spi2-atk libXt xorg-x11-server-Xvfb xorg-x11-xauth dbus-glib dbus-glib-devel nss mesa-libgbm

# python에서 크롤링을 실행하기 위한 selenium 설치
RUN pip install -r selenium

COPY --from=build /opt/chrome-linux64 /opt/chrome
COPY --from=build /opt/chromedriver-linux64 /opt/

# main 실행
COPY main.py ./
CMD [ "main.lambda_handler" ]
Dcokerfile을 통해 webdriver, chrome을 설치하고 main.py를 실행하도록 설정하였다.- 이후
docker build -t {repository_name} .로 이미지를 빌드한다.
Elastic Container Registry
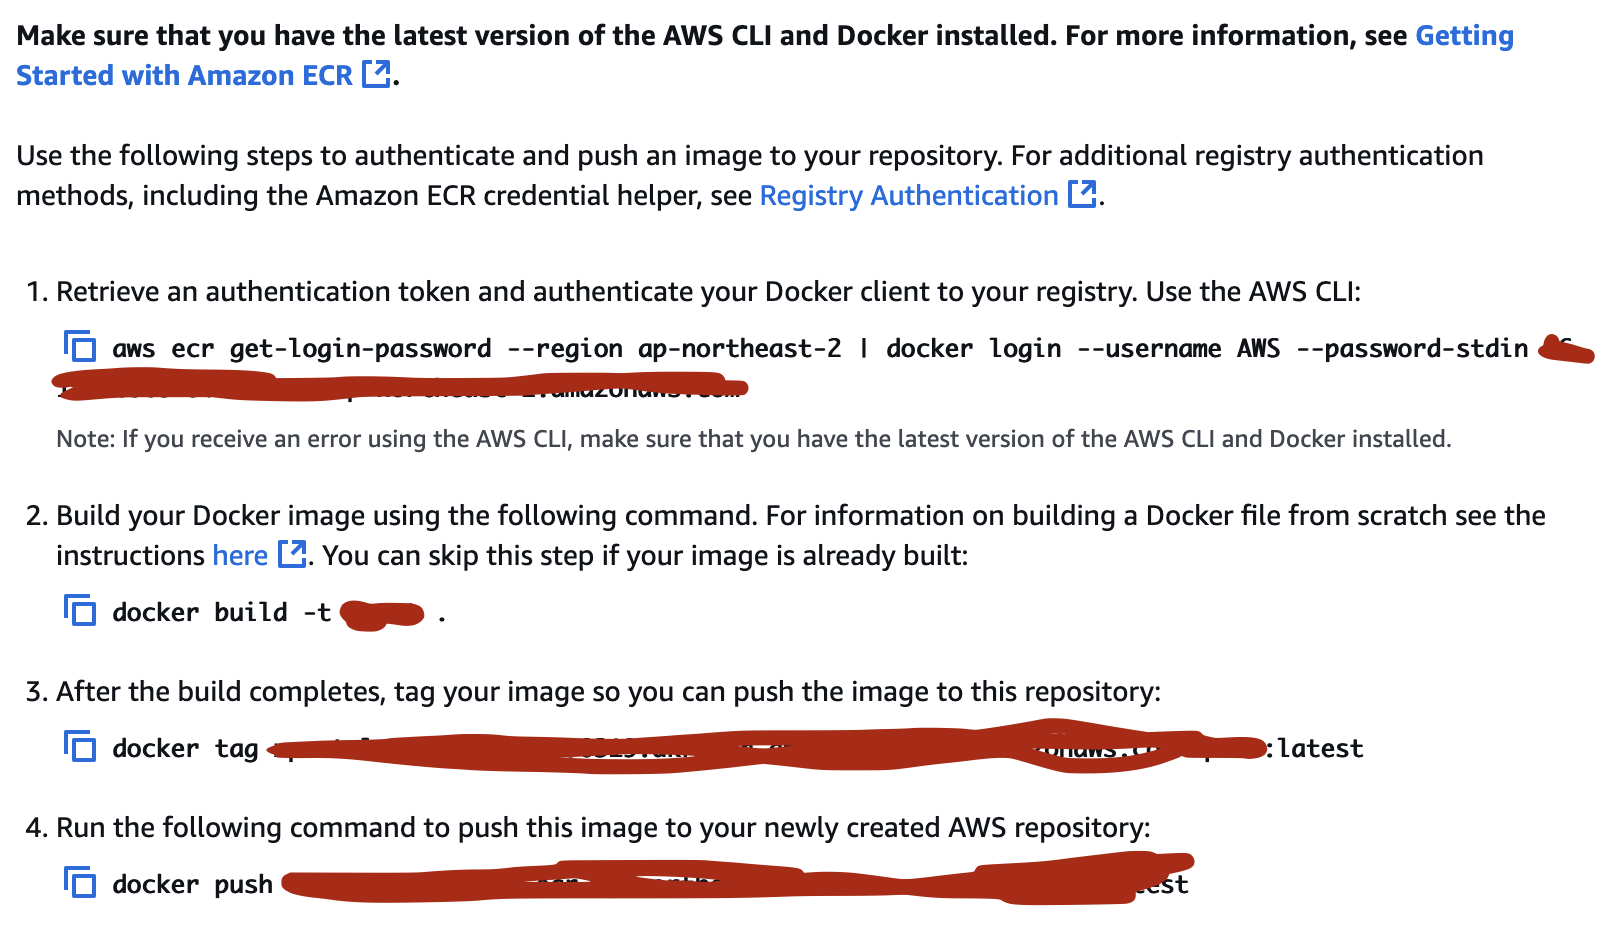
- 이제 AWS에 이미지를 올리기 위해 ECR(Elsatic Container Registry)에 리포지토리를 생성해야한다.
리포지토리 생성 후, push comment를 확인하면 다음과 같이 이미지를 생성한 리포지토리에 push하는 명령어를 보여준다.
- 이미지 푸시 후,
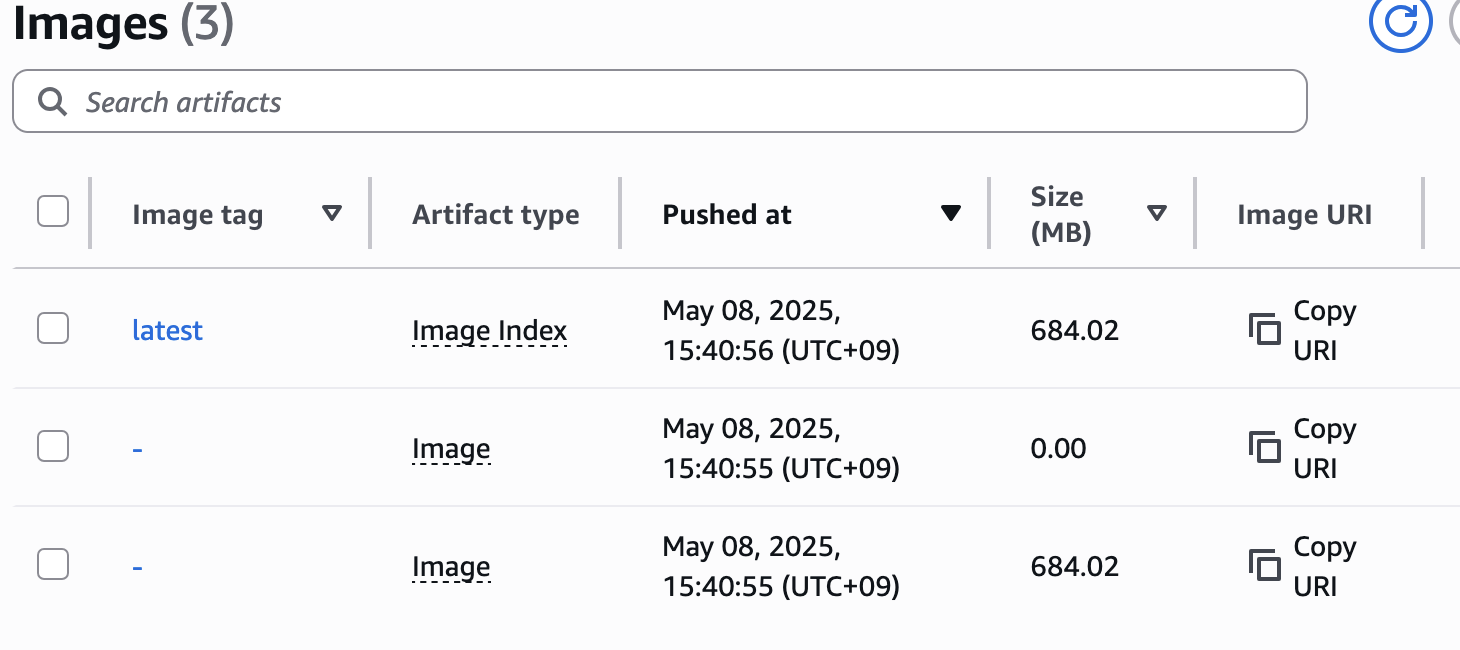
- 다음과 같이 이미지가 올라온 것을 확인할 수 있다.
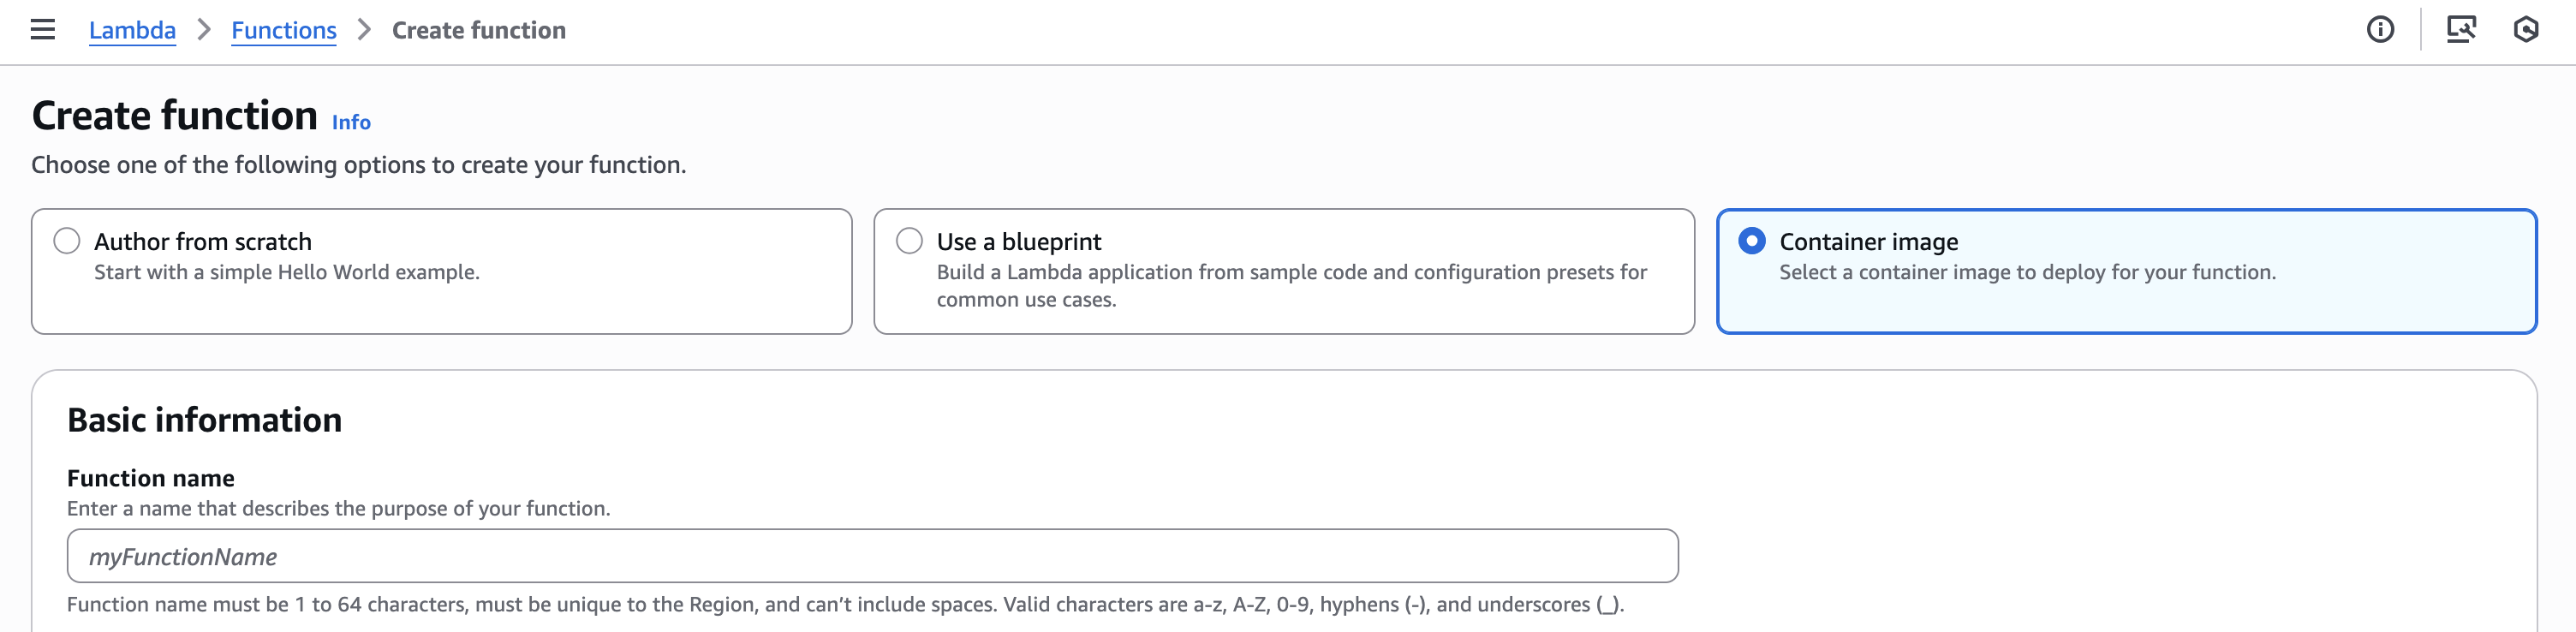
- 이제 lambda 생성에서 Container image를 선택한 후,
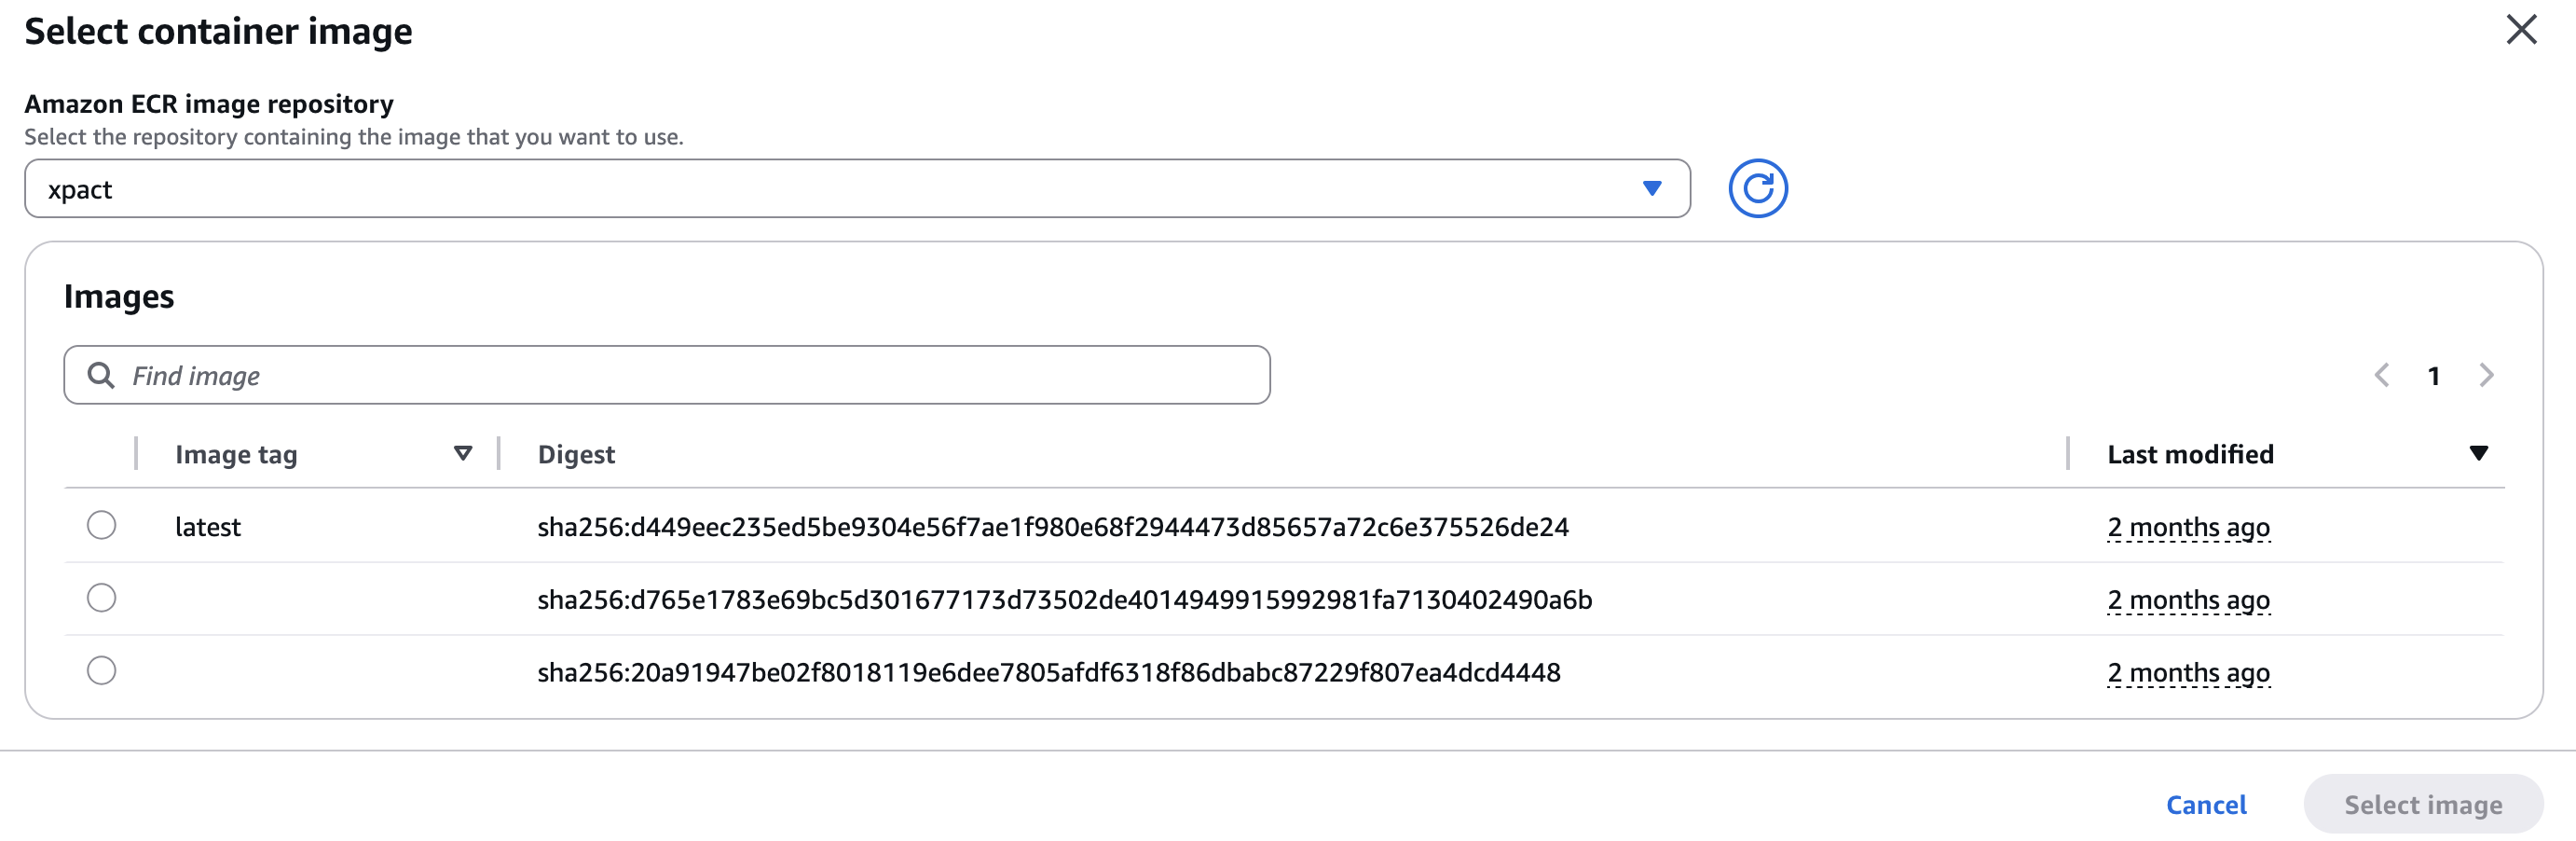
- 리포지토리를 선택한 뒤 푸시한 이미지를 확인할 수 있다.
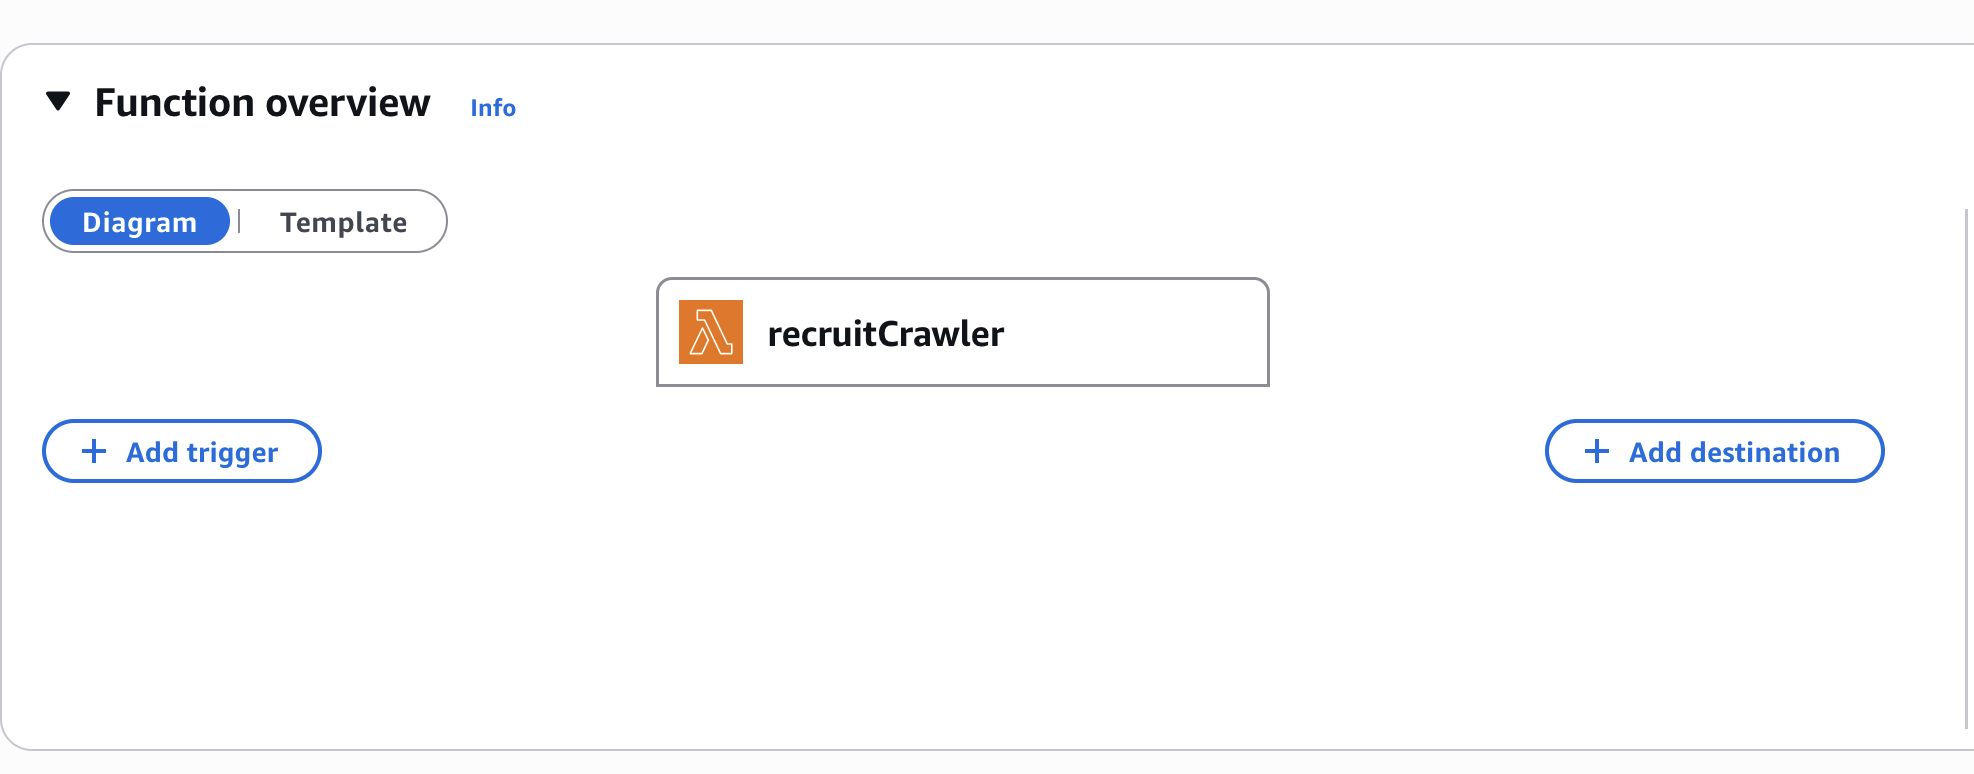
- 다음과 같이 람다함수가 생성되었다.
- 이를 Spring 애플리케이션에서 사용하는 방식은 2가지가 있다.
- 해당 람다함수에 API Gateway를 붙여 Spring에서 REST 요청을 통해 람다함수를 트리거하는 방식과,
- Spring에서 aws-sdk lambda의존성을 통해 등록된 람다함수를 트리거하는 방식이다.
- 본인은 2번째 방식을 사용하여 람다를 트리거하였다.

- 결국 Selenium을 서버에서 사용하지 않고 람다를 통해 스크래핑을 진행할 수 있었다.
결론
- 웹사이트를 스크래핑 하기 위해 Selenium부터 lambda까지 많은 기술들을 시도해보며 시행착오를 겪고 결국엔 해결할 수 있어서 뜻깊은 이슈였다.
원문: Velog